
? Are you looking for a reliable replacement part that restores your Ecobee thermostat’s functionality without breaking the bank?
 Part")
Buy EB-STATE7P-01 Smart Thermostat On Amazon
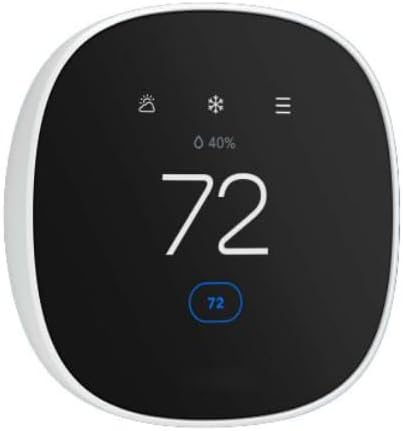
Product overview: EB-STATE7P-01 Smart Thermostat Lite Pro Replacement for Ecobee Genuine Original Equipment Manufacturer (OEM) Part
This EB-STATE7P-01 replacement part is built to match the original factory specifications so you can expect a precise fit and dependable performance. You’ll find it’s targeted at returning your Ecobee thermostat to peak operation and avoiding larger repairs down the road.
What this part is and why it matters
This is a genuine OEM-quality replacement component designed to be compatible with the Ecobee Smart Thermostat Lite Pro series. You should expect the same standards as the original part so your system behavior remains consistent after replacement.
Product highlights in brief
The part emphasizes long-lasting durability, straightforward installation, and restored performance at a cost-effective price. You will appreciate that it’s focused on minimizing downtime and preventing more expensive HVAC repairs.
EB-STATE7P-01 Smart Thermostat Lite Pro Replacement for Ecobee Genuine Original Equipment Manufacturer (OEM) Part
What’s included and unboxing expectations
When you receive the EB-STATE7P-01, you should check the packaging for the replacement component and any small hardware or instructions included. You will usually find a compact package with the part and possibly minimal documentation to guide the physical swap.
Physical components to expect
You should expect the replacement board or assembly to have connectors matching factory plugs, mounting points consistent with your thermostat housing, and protective packing to prevent shipping damage. You will notice labeling on the part that helps confirm correct orientation and connectivity.
Packaging and documentation
The packaging tends to be straightforward and protective rather than elaborate, which keeps costs down and reduces waste. You should receive at least a basic leaflet or sticker indicating the part number and intended models, which helps you verify compatibility before installation.
Key specifications and compatibility
This section details the specs you need to verify before ordering so you won’t run into fit or function problems. You should always cross-check your existing thermostat’s model number with the EB-STATE7P-01 designation.
Compatibility checklist
You should confirm that your thermostat is an Ecobee Smart Thermostat Lite Pro model or a model explicitly listed for the EB-STATE7P-01 replacement. You will want to check connector types, mounting holes, and electrical characteristics to ensure full compatibility.
Technical notes to verify
You should verify power requirements, terminal labeling, and firmware or hardware revisions if your Ecobee has had previous repairs. You will want to ensure the replacement part supports the same sensors and peripheral connections as the original.
Quick comparison table
The table below breaks down the main features and what they mean for you in clear terms. Use this to quickly decide if this part meets your expectations and system needs.
| Feature | What it means for you | Why it matters |
|---|---|---|
| Genuine OEM Quality | Component built to original factory specifications | Ensures fit, function, and consistency with your existing thermostat |
| Long-Lasting Durability | High-quality materials and manufacturing | Reduces frequency of future replacements and handles everyday use |
| Easy Installation | Straightforward replacement process and matching connectors | Saves you time and potentially avoids hiring a technician |
| Enhanced Performance | Restores your appliance to peak efficiency | Helps maintain HVAC performance and comfort levels |
| Cost-Effective Solution | Addresses the issue early with an affordable part | Prevents expensive repairs by fixing the root cause quickly |
Design and build quality
The EB-STATE7P-01 is crafted to mirror the original part’s layout, connectors, and mounting points to ensure a near-seamless swap. You should notice that the materials and finish align with what you’d expect from an OEM replacement rather than a cut-rate aftermarket component.
Material choices and durability
You should expect quality plastics, reliable solder joints, and reinforced connectors where needed to handle repeated plug-ins. You will appreciate that these choices translate into fewer failures and more consistent operation over time.
Fit and finish details
You should find that tabs, screw holes, and connector placements match the original exactly, minimizing modifications during installation. You will like that attention to detail because it reduces the risk of accidental damage while you’re replacing the part.
Installation and setup process
The installation is designed to be simple if you’re comfortable with basic electrical components and follow safety steps. You should still turn off power and, if in doubt, consult a professional to avoid damaging the thermostat or surrounding systems.
Preparing for the replacement
You should power down your HVAC system at the breaker and remove the thermostat faceplate before touching any internal boards. You will want to take photos of existing connections so you can quickly restore wiring to the correct terminals during reassembly.
Step-by-step installation guide
You should start by disconnecting power, removing the thermostat from its mounting plate, and carefully unplugging connectors from the original part. You will then mount the EB-STATE7P-01 in place, reconnect the same wiring harnesses and screws, replace the faceplate, and restore power to test functionality.
Tools and supplies you’ll need
You should have a small Phillips-head screwdriver, needle-nose pliers, and a multimeter handy to confirm power and connections as necessary. You will find that being prepared minimizes the installation time and reduces the chance of improper connections.
Performance and reliability after replacement
After installation, this part aims to restore your thermostat’s normal behavior, including accurate readings and reliable control of HVAC systems. You should see improved stability and fewer unexplained failures if the original issue stemmed from a faulty internal component.
Thermostat functionality you can expect
You should expect your Ecobee to resume responding to temperature changes, schedule commands, and remote inputs just like it did before the failure. You will notice if sensors or peripherals were affected; the replacement should return those functions to their original performance level.
Energy efficiency and user impact
You should find that restoring proper thermostat operation helps your HVAC system maintain efficiencies and can prevent wasteful cycling or incorrect temperature hold. You will benefit from consistent comfort and potentially lower energy bills compared to running a partially failing thermostat.
Common failure scenarios this part addresses
This replacement is often used when the thermostat no longer powers on, fails to control relays, or shows erratic behavior that points to an internal component fault. You should understand that not all problems originate from the same failure points, so proper diagnosis helps you avoid unnecessary part swaps.
Symptoms that indicate a board replacement may help
You should look for symptoms like a blank display, intermittent operation, inability to communicate with the HVAC equipment, or failure to respond to inputs. You will want to first rule out simple issues like tripped breakers, loose wires, or app configuration errors.
When the part might not solve the problem
You should be aware that if sensors, wiring harnesses, or the HVAC equipment itself are at fault, replacing this board may not cure the problem. You will need to examine the full system, especially if errors persist after the swap, and consider professional diagnostics.
Purchase The EB-STATE7P-01 Smart Thermostat
Who benefits most from this replacement
If you’re a homeowner or renter with a malfunctioning Ecobee Smart Thermostat Lite Pro, this OEM part is a practical path to restore normal operation. You should find the part especially useful when you want reliable fitment and OEM-level quality without paying full price for a new thermostat.
Homeowners and DIYers
You should feel comfortable attempting this repair if you know basic tools and follow safety steps; the installation is straightforward for confident DIYers. You will save money compared with buying a new thermostat or paying for extended service appointments when the fix is accessible.
Technicians and HVAC professionals
You should find this replacement valuable as a service part because it reduces return visits and improves first-time fix rates. You will appreciate that OEM parts help maintain manufacturer warranty relationships and customer trust.
Pros and cons summary
This section gives you a compact view of benefits and trade-offs so you can weigh whether this specific part aligns with your needs. You should consider both the immediate advantages and the scenarios where you might need a different solution.
Pros
You should expect compatibility with factory standards, a good balance of durability and cost, and a relatively simple install process. You will value that it helps you avoid broader HVAC failures by addressing the failing component directly.
Cons
You should know that this part won’t fix problems that originate outside the thermostat, like damaged wiring, failed sensors, or faulty HVAC equipment. You will also want to verify return policies and warranty coverage because OEM parts sometimes have tighter return windows than retail electronics.
Troubleshooting and tips during installation
If you run into problems during the swap, there are common checks that usually reveal the issue quickly. You should follow these troubleshooting tips to save time and prevent mistakes.
Quick power and connection checks
You should confirm the breaker is off before starting work and then double-check voltage with a multimeter when you think you’ve completed the install. You will also want to visually verify each connector is fully seated and that no pins are bent or recessed.
Testing before finalizing
You should power the system and test basic operations like turning heat and cool on, changing setpoints, and testing fan commands before reassembling everything fully. You will save effort if you find and correct wiring mistakes while the cover is off rather than removing the thermostat again later.
Maintenance and longevity tips
Keeping your thermostat and its components in good condition helps avoid repeat failures and extends service life. You should adopt simple maintenance habits to protect your investment.
Routine checks you should perform
You should periodically inspect thermostat connections for dust, corrosion, or loose wires, and check that firmware is up to date if applicable. You will also want to confirm that HVAC system responses remain consistent with thermostat commands during seasonal transitions.
Environmental considerations
You should avoid exposing the thermostat’s internal components to excessive humidity, dust, or direct sunlight, which can accelerate wear. You will benefit from placing thermostats in stable, central locations away from heat sources and drafts.
Comparison: OEM replacement vs aftermarket options
Choosing between a genuine OEM part and a lower-cost aftermarket alternative is something you’ll need to consider based on your priorities. You should weigh the pros and cons of each approach so you can select what’s best for reliability, price, and warranty.
OEM advantages and trade-offs
You should expect an OEM part like the EB-STATE7P-01 to match the original exactly, making installation smoother and increasing the likelihood of a long-term fix. You will accept a slightly higher upfront price in exchange for peace of mind and reduced compatibility risk.
Aftermarket considerations
You should note that aftermarket parts can be significantly cheaper but sometimes require adaptors, minor modifications, or acceptance of different quality levels. You will want to verify reviews, seller reputation, and return policies before buying aftermarket components.
Pricing and value analysis
When you consider the cost of the part plus your time or any labor, this replacement often represents strong value compared to full thermostat replacement. You should factor in the potential savings from avoiding an HVAC contractor call and the extended life you’ll get from restoring the original unit.
Cost-saving scenarios
You should find that replacing just the failed component is far less expensive than a full thermostat replacement if your device is otherwise functional. You will also save when the fix prevents more serious HVAC wear or failure that would require much costlier repairs.
When a full replacement might be better
You should opt for a full replacement if your thermostat is outdated, has multiple failures, or you want new features like updated Wi-Fi or improved app integration. You will find that in those cases, investing in new hardware can be a better long-term choice.
Warranty, returns, and purchasing tips
You should always check the seller’s warranty and return policy before buying to protect yourself in case of damaged parts or incompatibility. You will benefit from buying through reputable channels that offer clear support and easy returns.
What to look for when buying
You should confirm the exact part number, ask for confirmation of compatibility, and check whether the part comes with any limited warranty or replacement guarantee. You will want to keep receipts and photos of the defective part to streamline any return or warranty claim.
Shipping and handling advice
You should ensure the part is shipped with adequate packaging to avoid transit damage and verify estimated delivery times if you need a quick repair. You will also value seller responsiveness in case questions arise before or after purchase.
Real-world user expectations
In real installations, customers typically report that OEM replacement parts like the EB-STATE7P-01 restore normal operation when the root cause is an internal board or component failure. You should understand that success depends on correct diagnosis and careful installation.
Typical results after installation
You should see your thermostat power up, respond to inputs, and control HVAC stages reliably if the replacement addresses the original failure. You will notice improved stability and fewer intermittent issues in most cases.
When to call a professional
You should call a professional if you’re uncomfortable handling electrical components, if replacing the part doesn’t fix the problem, or if you suspect issues with the broader HVAC system. You will save time and avoid possible damage by getting experienced help in complex cases.
Frequently asked questions (FAQ)
This short FAQ answers common concerns so you can make an informed purchase and perform the replacement with confidence. You should still consult official manuals or a technician for system-specific questions.
Will this part fit my Ecobee model?
You should verify the EB-STATE7P-01 is listed for your specific Ecobee Smart Thermostat Lite Pro or consult the seller for confirmation. You will want to check connector types and mounting patterns to ensure a proper match.
Does replacing this part void my thermostat warranty?
You should check your original warranty terms because opening the thermostat and replacing parts could affect warranty coverage. You will want to contact Ecobee support or review your warranty paperwork before performing any self-repair.
Final verdict and recommendation
If you want an OEM-quality, cost-effective way to restore your Ecobee Smart Thermostat Lite Pro, the EB-STATE7P-01 is a sensible option that balances fit, performance, and price. You should proceed with this part if you’re confident in basic installation steps and have confirmed compatibility with your model.
Buying tip before you order
You should double-check the exact model and part number of your thermostat, take photos of the internal layout, and consider whether you want to handle the swap yourself or hire a technician. You will find that taking these preparatory steps helps ensure the replacement goes smoothly and successfully.
Closing maintenance checklist
Before you finish, you should power down and secure all connections correctly, test system functions thoroughly, and store documentation for future reference. You will thank yourself later for having a clean record of what you replaced and when it was done.
Quick after-install checklist you should follow
You should verify that the thermostat is responsive, that HVAC stages engage correctly, and that there are no error messages after installation. You will also want to observe normal operation for a day or two to catch any intermittent issues early.
If you’d like, you can tell me the exact model number of your Ecobee and the symptoms you’re seeing, and I’ll help you confirm compatibility and walk you through the replacement steps tailored to your setup.
Get The EB-STATE7P-01 Smart Thermostat Now
Disclosure: As an Amazon Associate, I earn from qualifying purchases.