
Are you trying to find a floor-heating thermostat that balances smart features, safety, and energy tracking?
Buy Schluter Ditra-Heat-E-RS1 Smart Thermostat On Amazon
Product Overview
You’ll find the Schluter Ditra-Heat-E-RS1 Smart Thermostat with Floor Sensors, Energy Tracking, GFCI Protected – Ideal for Home Floor Heating – Mirror-Finish, App Control, Voice Assistant Compatible – DHERT105/BW is designed specifically for tile and stone floor heating systems using Schluter’s DITRA-HEAT-E-HK cables. The unit targets homeowners who want a clean-looking control, accurate floor sensing, and modern smart home integration without compromising on safety. You should expect a blend of app-driven convenience, a mirror-finish faceplate for aesthetics, and a built-in class A GFCI for shock protection.

Schluter Ditra-Heat-E-RS1 Smart Thermostat with Floor Sensors, Energy Tracking, GFCI Protected - Ideal for Home Floor Heating - Mirror-Finish, App Control, Voice Assistant Compatible - DHERT105/BW
Key Specifications
The table below gives a clear snapshot of the main specifications so you can quickly compare them with other thermostats or your home requirements. You’ll get the important numbers at a glance.
| Feature | Specification |
|---|---|
| Product Name | Schluter Ditra-Heat-E-RS1 Smart Thermostat with Floor Sensors, Energy Tracking, GFCI Protected – DHERT105/BW |
| Voltage Compatibility | 120V and 240V |
| Max Load | 15 amps (additional power module available for larger systems) |
| Sensors | Temperature sensors for floor (included) |
| Safety | Class A Ground Fault Circuit Interrupter (GFCI) |
| Smart Control | App control + voice assistant compatibility |
| Aesthetic | Mirror-finish faceplate |
| Energy Tracking | Built-in in-app energy usage monitoring |
| Warranty | 3-year limited warranty (installed per Schluter documentation) |
| Ideal For | DITRA-HEAT-E-HK heating cables (tile and stone floors) |
Purchase The Ditra-Heat-E-RS1 Smart Thermostat
First Impressions
When you unbox this thermostat, you’ll notice an emphasis on a premium look and straightforward functionality. The mirror-finish faceplate gives a modern touch that sits flush against most wall finishes, and the overall presentation feels more upscale than many basic line-voltage thermostats.
You’ll also notice the floor sensors and the included documentation, which are helpful if you’re doing this for the first time. The unit feels solid in hand and the packaging is protective, which reduces the risk of transit damage.
Design and Build Quality
The faceplate and controller are built to fit seamlessly with contemporary interiors, so you won’t feel like you’ve sacrificed style for function. The mirror finish is attractive and easy to wipe clean, although it can show fingerprints—so plan for occasional wiping if aesthetics matter to you.
Mechanically, the thermostat uses robust plastics and metal contacts that are what you’d expect for a rated line-voltage device. You’ll feel that this was designed for in-wall mounting with durable construction, and the weight and fit suggest a product built for long-term use.
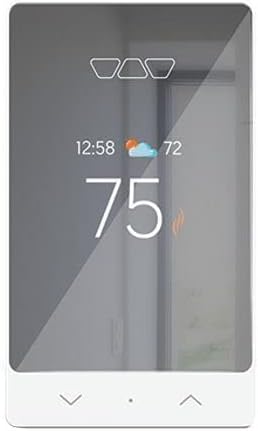
Mirror-Finish and Controls
The mirror-finish front gives a high-end look, and the touch/button layout is minimalistic, which can be both good and limiting depending on your preference. You’ll appreciate the clean aesthetic, but if you prefer tactile buttons with larger labels, you may need to rely more on the app.
The control interface is primarily designed to be handled via the app for day-to-day adjustments; local controls are present but intentionally simple. This keeps the wall interface neat while moving the more detailed functions into the app.
Installation and Setup
You’ll want to follow the Schluter Installation Handbook and Technical Data Sheet closely when wiring and installing this thermostat. If you don’t have experience with line-voltage wiring, you should plan to hire a licensed electrician because you’re dealing with mains voltages and GFCI protected circuits.
The physical installation follows standard in-wall thermostat mounting practices, and the documentation lays out wiring diagrams clearly for both 120V and 240V setups. You’ll need to check load calculations and potentially add the optional power module if your system draw exceeds the 15-amp rating.
Wiring and Compatibility
This thermostat supports both 120V and 240V DITRA-HEAT-E-HK cables with a maximum load rating of 15 amps. You’ll have to verify the total wattage of your heating cables against the thermostat’s rating; if you have a larger system, Schluter offers an additional power module to expand capacity safely.
You’ll need to match the wiring to local electrical codes and the device’s labeled connections. The built-in GFCI adds a layer of wiring complexity but is essential for safety; follow the wiring instructions carefully to ensure the GFCI is protecting the heating circuit, not unrelated circuits.
Sensors and Placement
The thermostat ships with floor sensors designed to be embedded near the heating element under your tile or stone. You’ll want to place them in a representative location—preferably in a high-traffic or central spot on the finished floor where you need the temperature controlled most.
If you place the sensor too close to the heating cable or near a heating fixture, you risk getting a misleading reading that could cause overshoot or under-performance. The placement guidance in the installation handbook is straightforward and should be followed for best results.
GFCI Protection and Safety
Safety is a prime feature: this thermostat includes a class A GFCI which will automatically cut power to the heating circuit if it senses a leakage current above the trip threshold. You’ll feel more secure knowing electrical shock risk is reduced and this helps meet electrical standards for wet areas like bathrooms.
The GFCI is integrated, so you don’t have to add a separate protective device, but you do need to test it after installation and periodically during use. The unit’s GFCI tester and manual give a simple step-by-step for verification.

App and Smart Features
You’ll use the Schluter app (or the compatible ecosystem app) to control schedules, set preferred temperatures, and view energy tracking data. The app is designed to make daily use simple while offering access to more advanced options when you want them.
The app setup pairs the thermostat to your home Wi-Fi and links it to voice assistant accounts for hands-free control. You’ll find that the app’s layout is friendly and logically organized for quick setup and ongoing management.
Energy Tracking
Energy tracking is one of the key modern conveniences here—you’ll see how much energy your floor heating uses over days, weeks, and months. This allows you to identify patterns and adjust schedules to lower your bills without sacrificing comfort.
The app displays energy usage in understandable units and associates usage with time periods so you can compare “before and after” changes, like lowering setpoints or using setback schedules. You’ll appreciate this data when you’re trying to justify the system’s operational cost or improve efficiency.
Voice Assistant and Integrations
This thermostat integrates with popular voice assistants, so you can tell your assistant to set the floor temperature without touching your phone. You’ll need to connect accounts once through the app and give necessary permissions, but after that voice commands are quick and convenient.
If you already use smart home platforms, the device will slot into routine-based automations or room temperature controls. You’ll find it straightforward to include floor heating in morning routines or vacation modes.
User Interface and App Setup
The app walks you through setup step-by-step, from Wi-Fi credentials to sensor calibration and schedule creation. You’ll appreciate visual cues and straightforward prompts that remove much of the guesswork from pairing and configuration.
Once set up, the app’s main dashboard gives quick access to current floor temperature, target temperature, schedule status, and an energy summary. You’ll find this layout helpful for both quick checks and deeper analysis.
Performance and Comfort
You’ll notice that the thermostat’s control of floor temperature is focused on comfort and consistency. Because it uses a dedicated floor sensor, it prevents floors from feeling too hot or cold in areas where you commonly stand or sit.
Heating response depends on your floor assembly and insulation, but the thermostat maintains steady temperatures and avoids aggressive cycling. You’ll see fewer temperature swings compared to systems that use only ambient air sensing.
Heating Uniformity and Response Time
Floor heating inherently has slower thermal response than forced air systems, but the Ditra-Heat-E-RS1 helps manage that by using floor sensing and smart scheduling. You’ll get an even warm feel across the tile surface when the system is correctly sized and the sensor is well placed.
The thermostat’s control logic helps prevent overshooting by using a combination of sensor-based control and predictive schedule features. You’ll notice comfortable floors when you step barefoot, which is the primary comfort metric for in-floor heating.
Floor Sensor Accuracy
The included floor sensors are accurate for near-surface floor temperature readings when installed as recommended. You’ll notice that the readings match the perceived comfort better than ambient room sensors, as these measure the surface you contact directly.
If you need extreme precision for specialized spaces, you can validate sensor readings with a handheld thermometer during setup. For typical residential use, the supplied sensors are more than adequate.
Energy Use and Cost Savings
Because the thermostat includes energy tracking and scheduling, you’ll be able to reduce running costs by using setback periods and efficient routines. You’ll want to optimize start times so the floor warms when needed rather than keeping it at high temperatures all day.
Practical savings will vary by climate, floor assembly, and usage patterns. However, you’ll likely notice a reduction in wasted heating hours once you use the scheduling and energy analysis tools.
How Energy Tracking Helps
Energy tracking shows you when the most energy is used and which setpoint changes create the largest impacts. You’ll get data that enables timed adjustments—like lowering temperatures when no one is home or preheating before you wake—to reduce consumption.
This information also helps you compare different habits, such as higher floors with more insulation versus less insulated spaces. You’ll begin to see which behaviors produce the best comfort-to-energy ratio.
Practical Cost Examples
While exact savings depend on local electricity rates and system size, here are general examples you can apply: if you reduce your average operating temperature by 2–3°F for 8 hours daily, you could cut energy use noticeably—often by double-digit percentages over a billing period. You’ll need to factor in your floor’s thermal mass; a well-insulated floor responds efficiently, making savings more meaningful.
Over a winter season, you’ll find that targeted reductions and smart scheduling can significantly reduce running costs compared with leaving floor heat at a constant high setting.
Troubleshooting and Maintenance
You’ll need to perform periodic checks and simple maintenance to ensure reliability. The GFCI should be tested regularly, sensors should be verified for proper placement, and the app should be kept current for firmware updates.
Most common issues can be resolved through basic troubleshooting steps like Wi-Fi reconnection, sensor re-seat, and power cycling.
Common Issues and Fixes
If the thermostat won’t connect to Wi-Fi, you’ll first check your network credentials and the router’s 2.4 GHz/5 GHz compatibility. Many devices work best on the 2.4 GHz band. If the floor doesn’t heat, check breaker and GFCI trip status; if GFCI has tripped, reset it following the instructions after ensuring no ground faults remain.
If the temperature reading seems off, confirm sensor placement and test the sensor with a secondary thermometer. You’ll likely resolve most false readings by repositioning the sensor according to the installation guide.
Resetting and Firmware Updates
If you encounter persistent issues, a factory reset or firmware update may be needed. You’ll find reset instructions in the manual and firmware updates are usually delivered through the app. Keep the app on the latest firmware to benefit from performance improvements and bug fixes.
Always perform resets and updates safely—ensure the wiring and power are stable, and consult an electrician if uncertain about any step.
Warranty and Support
The thermostat comes with a 3-year limited warranty against manufacturing defects when installed per Schluter’s Installation Handbook and Technical Data Sheet. You’ll need to follow the specified installation procedures and local building codes to keep warranty coverage valid.
Support is typically available through Schluter’s customer service channels and documentation resources. If you’ve installed the unit per instructions and still have problems, Schluter support can help you determine if the issue is covered under warranty.
Pros and Cons
You should weigh advantages and limitations before committing. Below is a concise list to help you decide.
Pros:
- Built-in class A GFCI for safety and code compliance.
- App-based control with energy tracking to help manage costs.
- Voice assistant compatibility for hands-free control.
- Supports both 120V and 240V DITRA-HEAT-E-HK cables.
- Clean mirror-finish aesthetic for modern interiors.
- 3-year limited warranty when installed per Schluter guidance.
Cons:
- 15-amp max load could require an additional power module for larger installations.
- Mirror finish shows fingerprints and requires occasional cleaning.
- App-centric control might frustrate users who prefer full-featured local controls.
- Professional installation recommended due to line-voltage wiring and GFCI integration.
Comparison with Alternatives
You’ll find other smart thermostats on the market, including some that focus on ambient sensing or integrate with baseboard heaters. Compared to general smart thermostats, this Schluter unit is purpose-built for in-floor tile and stone heating.
Where generic line-voltage thermostats might lack integrated GFCI protection, Schluter includes it, which is a major advantage in bathrooms and wet areas. You’ll trade off extensive third-party ecosystem features for a device designed specifically for DITRA-HEAT-E-HK systems and tile floor constraints.
Who Should Buy It
If you’ve installed or plan to install a DITRA-HEAT-E-HK cable system under tile or stone, this thermostat is a solid choice. You’ll appreciate its safety features, floor-sensing accuracy, and smart controls for daily convenience.
If you need a thermostat for forced-air systems or underlayment types it wasn’t designed for, this may not be the right fit. Also, if your system draw exceeds 15 amps and you’re not prepared to add the power module, consider a higher-capacity solution.
Final Verdict
You’ll get a smart thermostat that focuses on safety, aesthetics, and practical energy management if you choose the Schluter Ditra-Heat-E-RS1 Smart Thermostat with Floor Sensors, Energy Tracking, GFCI Protected – Ideal for Home Floor Heating – Mirror-Finish, App Control, Voice Assistant Compatible – DHERT105/BW. It’s well-suited to tile and stone floors using Schluter’s heating cables, gives you confidence with integrated GFCI protection, and includes modern smart conveniences like app control and energy tracking.
If you value precise floor temperature control, reliable safety features, and a clean, modern look, this is a compelling option. You’ll likely find it offers a strong combination of comfort and cost-management tools for winter months, especially when installed and operated according to Schluter’s guidance.
Frequently Asked Questions (FAQ)
You’ll probably have a few common questions; here are clear answers to the frequent ones people ask.
Q: Can this thermostat control non-Schluter heating cables?
A: It’s designed for DITRA-HEAT-E-HK systems; while electrical compatibility might allow other heating cables in theory, Schluter’s warranty and recommendations are focused on their system. You should follow local codes and manufacturer compatibility.
Q: How often should I test the GFCI?
A: Test the GFCI after installation and monthly thereafter. Regular testing ensures the protective mechanism remains functional.
Q: Do I need a professional electrician to install it?
A: If you’re not experienced with line-voltage wiring and GFCI-protected circuits, hiring a licensed electrician is strongly recommended. Correct installation is critical for safety and warranty coverage.
Q: What happens if my system draws more than 15 amps?
A: Schluter offers an additional power module to increase capacity. You’ll need to purchase and install that module according to instructions or consult your installer for an appropriately rated solution.
Q: Is the energy data exportable?
A: Export options depend on the app and firmware; check the app settings for data export or reporting features. If export is essential, confirm available functions before purchase.
If you have specific concerns about installation, floor construction, or compatibility with your smart home ecosystem, you’ll want to consult Schluter’s technical documentation or their support team to confirm details for your project.
Get The Schluter Ditra-Heat-E-RS1 On Amazon
Disclosure: As an Amazon Associate, I earn from qualifying purchases.