
Have you been thinking about making your electric in-floor heating smarter and more efficient?

Buy The Mysa Smart Thermostat For Electric In-Floor Heating On Amazon
What is the Mysa Smart Thermostat for Electric in-Floor Heating 240V | Class A GFCI | WiFi Programmable | App & Voice Control with Alexa, Google, Siri | No Subscription | Easy Install
You’re looking at a high-voltage smart thermostat designed specifically for electric in-floor heating systems. This Mysa model supports 120–240V line voltage systems and includes a built-in Class A GFCI, giving you both smart control and a safety feature that many line-voltage thermostats don’t include.
Mysa Smart Thermostat for Electric in-Floor Heating 240V | Class A GFCI | WiFi Programmable | App & Voice Control with Alexa, Google, Siri | No Subscription | Easy Install
Who this thermostat is for
If you have electric radiant floor heating and want app control, voice commands, and programmable schedules, this product is aimed at you. It’s not designed for hydronic (water-based) systems, so if your heating is water-driven, this is not the right pick.
Key features at a glance
You can expect WiFi connectivity, app-based scheduling, voice control with major smart assistants, no subscription fees, and an emphasis on safety by way of a Class A GFCI. The device is marketed as easy to install for someone comfortable with high-voltage wiring, though you should prefer an electrician if you’re unsure about electrical work.
Quick summary table
| Feature | Detail |
|---|---|
| Product name | Mysa Smart Thermostat for Electric in-Floor Heating 240V | Class A GFCI | WiFi Programmable | App & Voice Control with Alexa, Google, Siri | No Subscription | Easy Install |
| Voltage compatibility | 120–240V line-voltage electric in-floor heating systems |
| Hydronic compatibility | Not compatible with hydronic (water-based) systems |
| Safety | Built-in Class A GFCI |
| Connectivity | WiFi, mobile app |
| Voice control | Alexa, Google Assistant, Siri/HomeKit |
| Subscription | No subscription required |
| Installation | Designed for straightforward installation; electrician recommended for those not comfortable with high-voltage wiring |
| Ideal use | Electric radiant floor heating (in-floor heat mats, cables, or panels) |
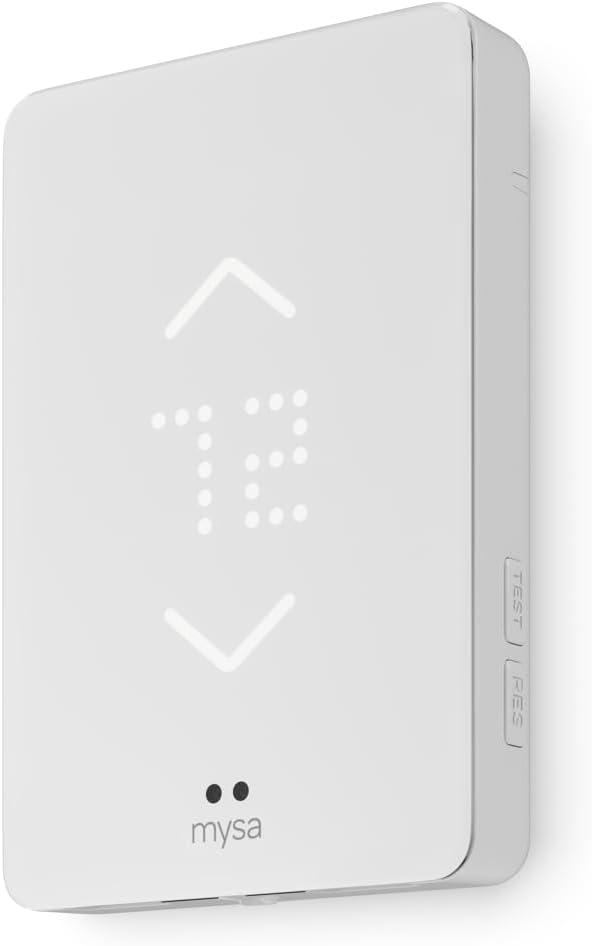
Design and hardware
The thermostat has a slim, modern profile intended to replace a conventional line-voltage thermostat in a wall box. You’ll notice minimal physical controls because most of the configuration lives in the app; this keeps the wall unit clean and simple. The built-in GFCI adds a layer of protection at the thermostat location, which matters for floor systems where moisture or damage to cables could otherwise present a hazard.
The built-in Class A GFCI explained
A Class A GFCI reacts to ground faults and trips quickly to reduce electrocution risk in residential settings. Having this integrated into the thermostat means you don’t need to install a separate GFCI device for the circuit at the thermostat location. That simplifies wiring in many installs and centralizes safety at the control point.
Compatibility and limitations
You must verify that your floor heating is electric and within the voltage range required by this thermostat. If you’re running a hydronic floor system, this device won’t work for you. You should also confirm that your circuit and load sizing match what your heater requires and that local codes allow installing a high-voltage thermostat in the intended location.
Confirming compatibility with your floor system
Check the heater manufacturer’s documentation for voltage and current draw, and compare that to the circuit and the thermostat instructions. If you’re replacing an older line-voltage thermostat, note how the existing wires are labeled and how the previous device connected — that will speed up your installation and avoid mistakes.
Purchase Mysa Smart Thermostat (Electric In-Floor Heating) — Amazon
Installation overview and tips
If you decide to install it yourself, you’ll follow familiar steps: shut off power at the breaker, remove the old thermostat, mount the new unit, wire line and load conductors, and configure the thermostat on the app. Because this is a high-voltage device with a built-in GFCI, pay attention to the wiring diagram and the labeling for line, load, and ground.
Safety steps to take before starting installation
Always turn off the breaker and verify power is off with a voltage tester. If your knowledge of high-voltage wiring is limited, hire a licensed electrician. You should also check the wall box depth, wire gauge, and mounting screws to ensure a safe, code-compliant install.
Typical wiring notes
You’ll be dealing with line and load conductors and a ground. The thermostat will have clearly marked terminals for line (incoming power), load (outgoing power to the heating element), and ground. Because the unit includes a GFCI, it may have neutral/line wiring specifics that differ from non-GFCI line-voltage thermostats; follow the manual closely.
When to call an electrician
If you see aluminum wiring, mixed cable types, non-standard colors, or you have any doubt about breaker sizing and load calculations, call an electrician. It’s better to pay for professional help than risk a bad connection or an undersized circuit.
App features and mobile control
You get remote control via the Mysa app, where you can set schedules, adjust temperatures from anywhere, and create tailored heating periods for different days. The app also typically supports simple programming options like daily schedules, vacation mode, and temporary overrides so you can be comfortable without manually changing the thermostat constantly.
Scheduling and automation
The app lets you build schedules that match your routine. If you’re away during the day, set the thermostat to lower temperatures and have it warm up before you return. These schedules are the core of saving energy and increasing comfort with in-floor heating.
Voice control and smart integrations
You can use Alexa, Google Assistant, and Siri/HomeKit to control the thermostat with voice commands. That means you can say simple phrases to adjust temperature or trigger scenes if you’ve integrated the thermostat into a broader smart home setup.
Example voice commands you might use
You’ll be able to ask your voice assistant to raise or lower the temperature, set a specific degree, or include the thermostat in routines like “Good Morning” to bring the floor up to a comfortable level before you step out of bed. Always pair via the app and the assistant’s skill or HomeKit configuration to enable voice control.
Energy usage and potential savings
Smart scheduling and precise temperature control can reduce energy waste from overheating or unnecessary heating cycles. For electric in-floor systems, maintaining consistent setpoints and only heating when needed tends to be more efficient than keeping high temps all day.
How you’ll measure savings
Track your electricity bills before and after installation and combine that with your usage patterns. If you’re able to program off times during the day and warm only during occupancy, you’ll likely see lower consumption compared to a thermostatically uncontrolled setup.

Comfort and performance
In-floor heating has a slower thermal response than forced-air systems, so your approach to programming and temperature adjustments will be different. You’ll want to set schedules so the floor has time to reach the set temperature ahead of occupancy, rather than expecting instant changes.
What to expect in daily use
Once you get the schedules tuned, you’ll notice consistent temperatures and fewer cold spots. The thermostat’s control helps you avoid overheating and reduces temperature swings, giving you a more even, comfortable floor surface.
Pros — what you’ll likely like
You’ll appreciate the blend of safety, smart connectivity, and user-friendly scheduling. The integrated Class A GFCI is a meaningful convenience and safety improvement. The lack of a subscription also means no recurring fees for core features.
Additional benefits you’ll notice
Remote access, voice control, and a clean wall display simplify daily comfort adjustments. If you often forget to change thermostats or want pre-warm routines, the scheduling and app control will be particularly helpful.
Cons — things to be aware of
This thermostat won’t work with hydronic systems, and it requires proper line-voltage wiring and potentially an electrician. The in-floor heating’s slow thermal response means you need to plan schedules in advance rather than rely on quick temperature changes. If your WiFi is unstable, you might face occasional connectivity limitations for remote control.
Potential installation headaches
If your wall box is shallow, the thermostat’s physical depth and wiring might be tight. Also, older homes with odd wiring conventions can complicate installation, so be prepared for a professional hookup if needed.
Troubleshooting common issues
If the thermostat won’t connect to WiFi, check your network band (2.4GHz is commonly required), ensure the correct password, and keep the unit within range of a reliable router. If the GFCI trips, inspect the floor cable for damage and make sure the heating element isn’t compromised. If the thermostat behaves strangely after installation, a firmware update via the app often resolves bugs.
Steps if the GFCI keeps tripping
Turn off the circuit and inspect floor wiring for nicks or abrasions. If you find no visible issues, call a pro to test insulation resistance on the heater cable and check connections. Persistent GFCI trips usually indicate a ground fault that must be addressed for safety.
Firmware, updates, and ongoing support
The manufacturer issues firmware updates to improve functionality and fix issues, so you’ll want to keep the thermostat up to date via the app. Customer support can help with setup, app problems, and warranty questions; save your purchase info in case you need it later.
How to update firmware
Open the app, check the device settings, and follow prompts if an update is available. Keep the thermostat powered during updates and avoid interrupting the process.

Integration with other smart home systems
You’re able to integrate the thermostat with mainstream voice assistants and HomeKit for Siri support. That allows you to include the thermostat in scenes, automations, and routines with your lighting, locks, and other smart devices.
Using automations with the thermostat
Set scenes to pre-warm floors before you get up, or link thermostat adjustments to presence sensors so the house only heats when people are home. These automations add convenience and can save energy when used sensibly.
Comparison with traditional thermostats
Compared to basic mechanical or simple line-voltage thermostats, this Mysa model brings remote access, scheduling, voice control, and a GFCI all in one. It modernizes an older heating control approach and lets you manage comfort from your phone.
What you gain over an older unit
You get better control granularity, remote diagnostics, and more sophisticated scheduling. That translates to fewer manual adjustments and an easier daily routine.
Price considerations and value
You’ll pay more than a basic non-smart thermostat, but you’ll also get convenience, integration, and improved safety. Consider this a long-term investment in comfort and potential energy savings rather than a short-term cost.
Deciding whether it’s worth the cost
If you value remote control, voice integration, and built-in safety features, it’s often worth the extra outlay. If you rarely change settings or don’t need remote control, a simpler thermostat might be sufficient.
Maintenance and care
There aren’t many moving parts to maintain. Keep dust off the unit and occasionally verify the GFCI functionality as directed by the manual. If the system reports errors, address them quickly to avoid prolonged downtime.
Recommended periodic checks
Test the GFCI functionality if the manual suggests a schedule, verify the firmware is current, and look for loose wall-mount screws or wire connections during a visual check if you ever experience issues.
Real-world user scenarios
If you have a morning routine that requires warm floors before you step out of bed, set a schedule that brings the floor temperature up 30–60 minutes beforehand. If you spend weekends at a vacation property, lower the temperature until the day before you arrive and then preheat remotely.
How others commonly use the thermostat
Users commonly set weekday and weekend schedules, use voice commands for instant adjustments, and rely on the app to manage vacation periods. These practical uses highlight the convenience you gain.
What to check before buying
Confirm your system type (electric in-floor), voltage, circuit capacity, and whether your current wiring has necessary spacing and labeling. Ensure your WiFi network is stable and that you want app and voice integration.
Quick pre-purchase checklist
- Confirm electric (not hydronic) floor heating
- Verify voltage (120–240V)
- Check circuit amperage and local code requirements
- Verify WiFi coverage and 2.4GHz availability
- Decide whether you’re comfortable doing high-voltage wiring or will hire an electrician
Installation timeline and effort
If you’re DIY-savvy and have a straightforward replacement, plan a couple of hours for a full swap and setup, including app pairing and scheduling. With an electrician, the actual physical install could be faster, but scheduling the service will add time.
What slows an install down
Confusing wiring from the old thermostat, shallow wall boxes, odd cable routing, or the need to upgrade the circuit breaker can make installation longer. Clear labeling and photos of your existing setup can speed the process.
Warranty and support expectations
Most smart thermostat manufacturers provide a limited warranty and online support resources. You’ll want to register the product and keep receipts in case you need warranty service. Support is typically available via app, website, and customer service lines.
What to do if there’s a defect
Contact the manufacturer’s support with photos and purchase documentation. If an electrician found an installation issue, they may also help you liaise with support to determine whether the unit or the installation is the fault.
Frequently asked questions
You’ll probably wonder about compatibility, safety, and smart features. The main universal answer is: this unit is for electric in-floor systems in the 120–240V range, includes a Class A GFCI, and offers app and voice control without a subscription. If you have specific wiring types or unusual heating loads, check the manual or ask an electrician.
Common quick answers
- Is it for hydronic floors? No.
- Do you need a subscription? No.
- Is voice control included? Yes, with major assistants.
- Do you need a separate GFCI? No, it’s built in.
Final verdict — how this helps you
If you want smarter control, integrated safety, and voice/app features for an electric in-floor system, this Mysa thermostat offers a strong package. It modernizes control, simplifies schedules, and centralizes safety at the thermostat, which is appealing if you value convenience and improved energy management.
Final buying tips
Double-check compatibility and wiring before buying, plan for installation time or an electrician, and use the app to create realistic schedules that match the thermal response of radiant floors. That combination will give you the best balance of comfort, safety, and efficiency.
Additional resources and next steps
Before you proceed, download the manual online, watch a manufacturer installation video, and read user reviews specific to your floor-heating brand to see if others have had easy installs. If you aren’t comfortable around line voltage, book an electrician for a safe and code-compliant install.
Immediate action items
- Confirm your floor heating type and voltage.
- Check WiFi coverage where the thermostat will be.
- Decide whether you’ll DIY or hire an electrician.
- Order the thermostat and any additional mounting or wiring hardware you might need.
If you want, tell me about your current system (voltage, old thermostat type, and whether you’re comfortable with electrical work) and I can walk you through a tailored installation checklist and wiring plan.
See Current Price On Amazon — Mysa Smart Thermostat
Disclosure: As an Amazon Associate, I earn from qualifying purchases.